The June
Daring Bakers challenge was hosted by Jasmine of
Confessions of a Cardamom Addict and Annemarie of
Ambrosia and Nectar. They chose a Traditional (UK) Bakewell Tart/pudding that was inspired by a rich baking history dating back to the 1800’s in England.
This was my first
Daring Bakers challenge, and I am dedicating it to the BF. Without a doubt, if it weren't for him, there is no way I would have completed this recipe. There were so many factors which tempted me to be a no-show for my very first challenge: (1) I was leaving to go out of town, and then out of the country, for 2 weeks, so would not be around to enjoy the results of the challenge (2) I really wanted to do something creative and I had the hardest time coming up with ideas (3) I had never heard of a Bakewell Tart, or even used almond flour, and (4) the recipe required a scale for measuring the ingredients, and my broke self does not own one.
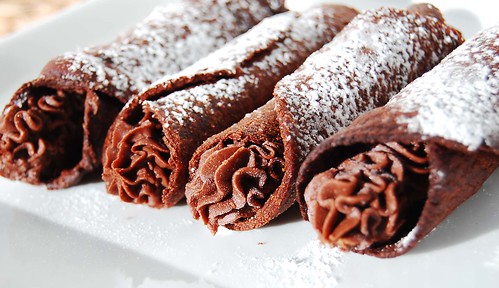
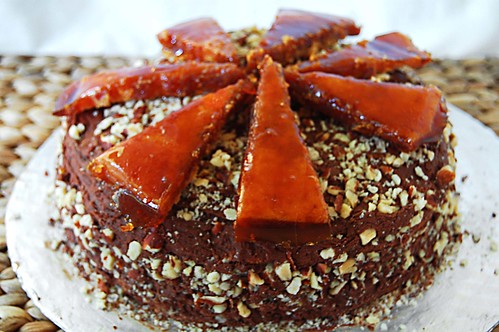
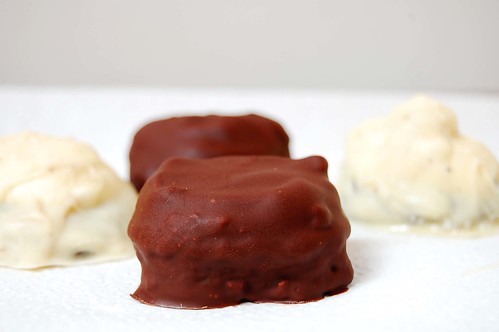
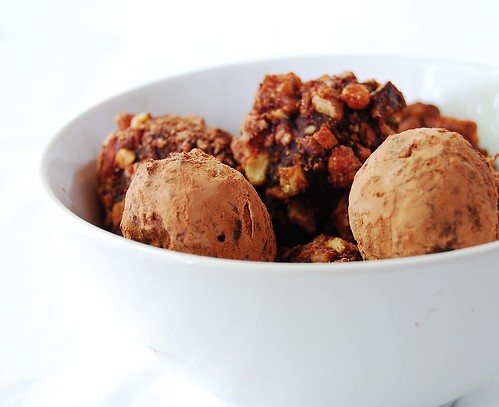
With some much needed moral support from the BF, I finally decided to tough it out and complete the challenge, and I am so glad I did! Since I was not going to be around to enjoy it, I decided the next best thing would be to give it away. I wanted to give half the tart to a friend I was visiting who just finished business school, and since she is a major chocoholic I knew that I would have to incorporate chocolate into the recipe. So instead of the traditional fruit spread which the recipe calls for, I decided to go with a chocolate spread. They're almost the same, right? Cocoa is a fruit, right? Oh, it's not? Ok, well it grows on trees, right? Oh, not really? Ok, well it's sweet like fruit, right? No?! Ok, they're not similar, but they both make good spreads, so there.
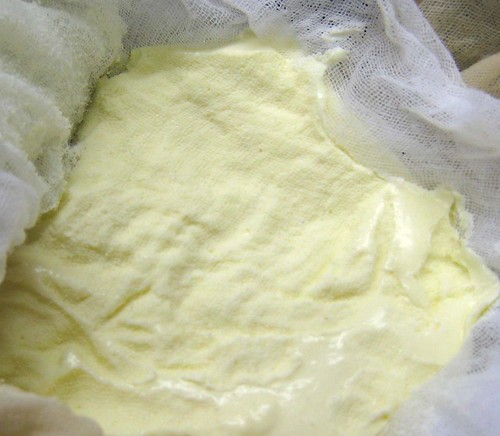
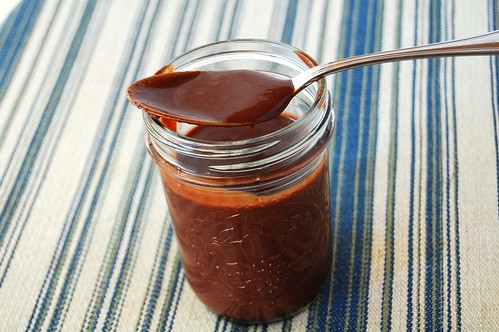
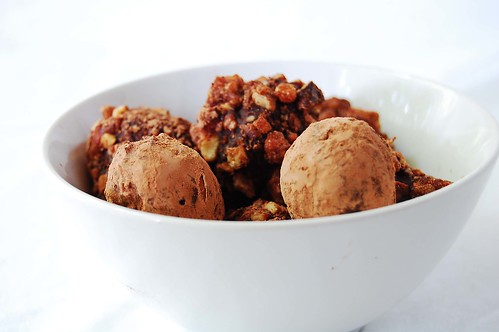
The most popular chocolate-based spread I know of is nutella, which is made with chocolate and hazelnuts. But since this dessert uses almond flour, I decided to make my own version of nutella, with almonds instead of hazelnuts. The
homemade almond "nutella" came out great, and was perfect for this dessert.
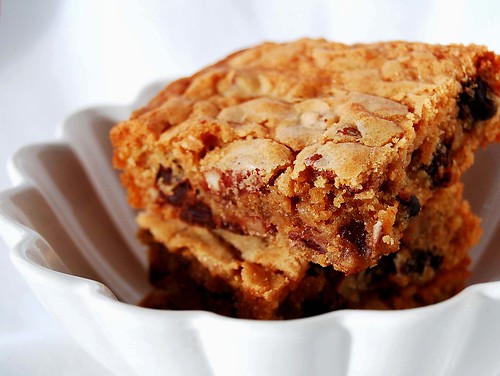
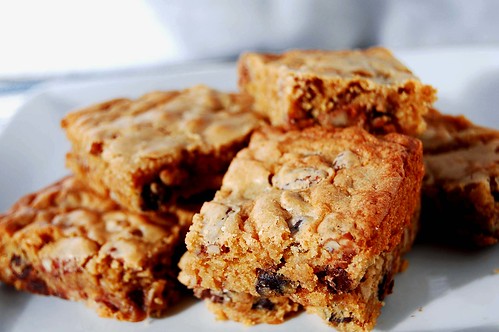
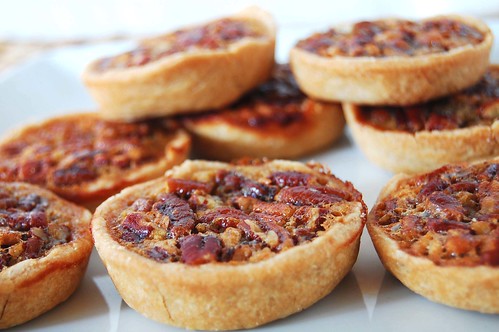
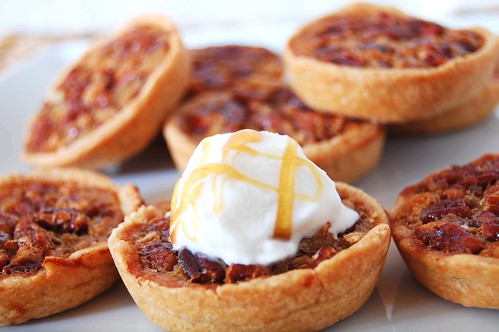
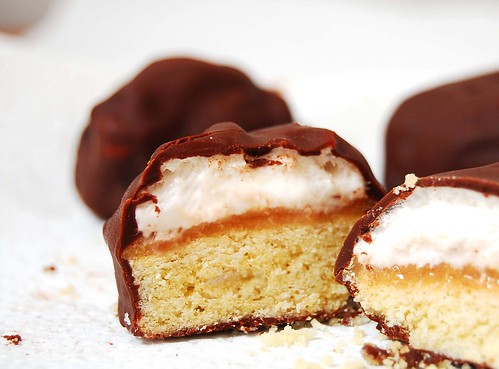
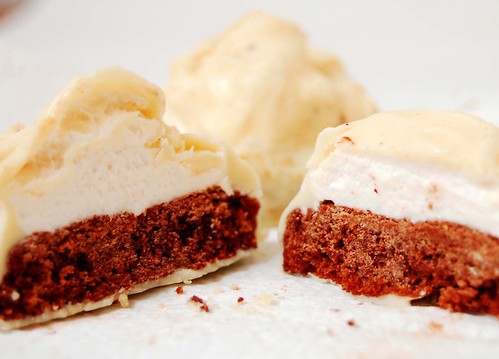
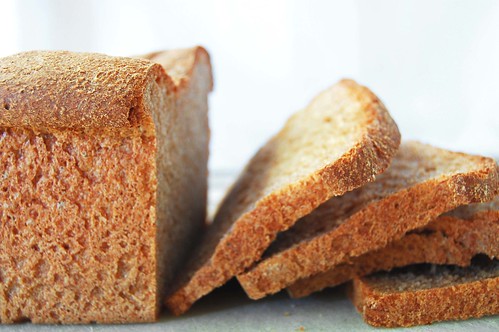
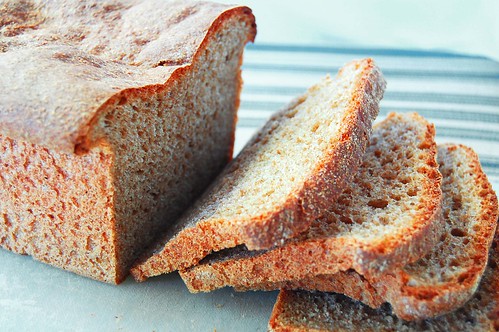
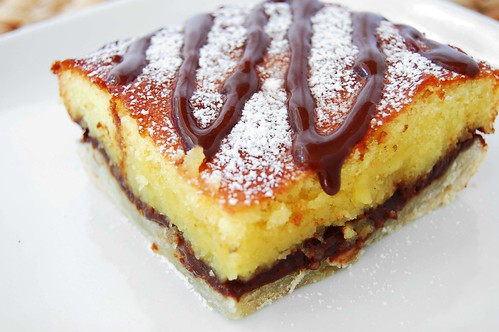
The Bakewell tart traditionally consists of a shortcrust pastry (like a pie crust), a layer of jam, and a frangipane (or almond cake) topping. I was a bit wary of this dessert, because I expected the frangipane to taste like marzipan, which I am not a fan of. Surprisingly, it tasted nothing like marzipan -- instead it was like a very rich, almost creamy, cake -- totally delicious. This was my first experience using almond flour and I loved it. It's a bit pricey compared to regular flour, but I will definitely be using it when I'm in the mood to splurge. Also, since I was short on time, I used my trusty pie crust recipe instead of the one given in the challenge. I really enjoyed this recipe. The butter, almond, and chocolate flavors came together really well to make a very rich and satisfying dessert.
As for measuring the ingredients -- the BF took them all to his lab and measured them for me using his lab scale! Ah, it's great to know a scientist, and even better when he's your boyfriend. :) As much as I appreciated his help, this challenge has definitely convinced me to invest in a kitchen scale, so
this little baby will be sitting on my counter in 5 to 7 business days. Woot!
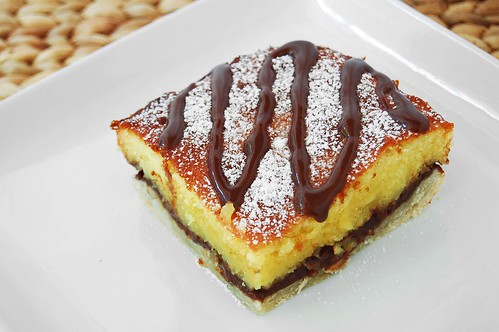
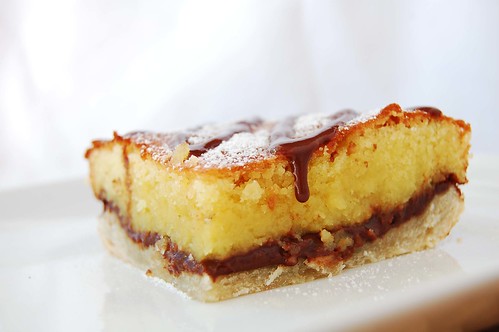 Bakewell Tart with Chocolate Almond Spread
- One quantity sweet shortcrust pastry (recipe follows)
- Bench flour
- 250ml (1cup (8 US fl. oz)) jam or curd, warmed for spreadability
- One quantity frangipane (recipe follows)
- One handful blanched, flaked almonds
Assembling the tart
Place the chilled dough disc on a lightly floured surface. If it's overly cold, you will need to let it become acclimatised for about 15 minutes before you roll it out. Flour the rolling pin and roll the pastry to 5mm (1/4”) thickness, by rolling in one direction only (start from the centre and roll away from you), and turning the disc a quarter turn after each roll. When the pastry is to the desired size and thickness, transfer it to the tart pan, press in and trim the excess dough. Patch any holes, fissures or tears with trimmed bits. Chill in the freezer for 15 minutes.
Preheat oven to 200C/400F.
Remove shell from freezer, spread as even a layer as you can of jam onto the pastry base. Top with frangipane, spreading to cover the entire surface of the tart. Smooth the top and pop into the oven for 30 minutes. Five minutes before the tart is done, the top will be poofy and brownish. Remove from oven and strew flaked almonds on top and return to the heat for the last five minutes of baking.
The finished tart will have a golden crust and the frangipane will be tanned, poofy and a bit spongy-looking. Remove from the oven and cool on the counter. Serve warm, with crème fraîche, whipped cream or custard sauce if you wish.
When you slice into the tart, the almond paste will be firm, but slightly squidgy and the crust should be crisp but not tough.
Sweet shortcrust pastry225g (8oz) all purpose flour
30g (1oz) sugar
2.5ml (½ tsp) salt
110g (4oz) unsalted butter, cold (frozen is better)
2 (2) egg yolks
2.5ml (½ tsp) almond extract (optional)
15-30ml (1-2 Tbsp) cold water
Sift together flour, sugar and salt. Grate butter into the flour mixture, using the large hole-side of a box grater. Using your finger tips only, and working very quickly, rub the fat into the flour until the mixture resembles bread crumbs. Set aside.
Lightly beat the egg yolks with the almond extract (if using) and quickly mix into the flour mixture. Keep mixing while dribbling in the water, only adding enough to form a cohesive and slightly sticky dough.
Form the dough into a disc, wrap in cling and refrigerate for at least 30 minutes.
Frangipane
125g (4.5oz) unsalted butter, softened
125g (4.5oz) icing sugar
3 (3) eggs
2.5ml (½ tsp) almond extract
125g (4.5oz) ground almonds
30g (1oz) all purpose flour
Cream butter and sugar together for about a minute or until the mixture is primrose in colour and very fluffy. Scrape down the side of the bowl and add the eggs, one at a time, beating well after each addition. The batter may appear to curdle. After all three are in, pour in the almond extract and mix for about another 30 seconds and scrape down the sides again. With the beaters on, spoon in the ground nuts and the flour. Mix well. The mixture will be soft, keep its slightly curdled look (mostly from the almonds) and retain its pallid yellow colour.

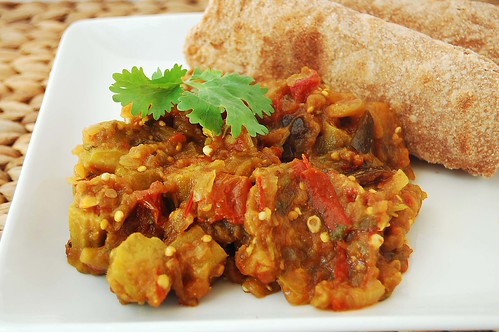
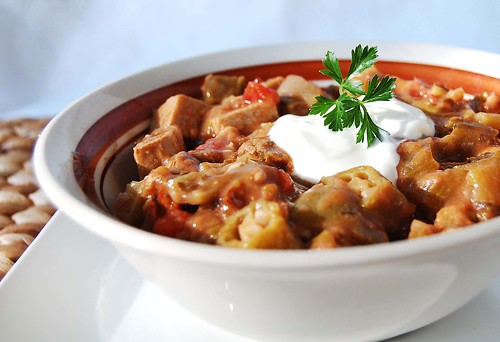 Gumbo is an extremely satisfying winter time meal. It is a thick stew, originating from louisiana, and often made with sausage, chicken, and seafood. Although I cannot attest for the meat version of this dish, the BF loves it, and I can't get enough of the vegetarian version. Even in the vegetarian version, the flavors are so complex, I often stop and think about all the ingredients while I'm eating it. There is the warmth from the vegetable broth, the kick from the spices, and the subtle sweetness from the Worcestershire sauce. To me, this gumbo is even better than what I've tried in New Orleans.
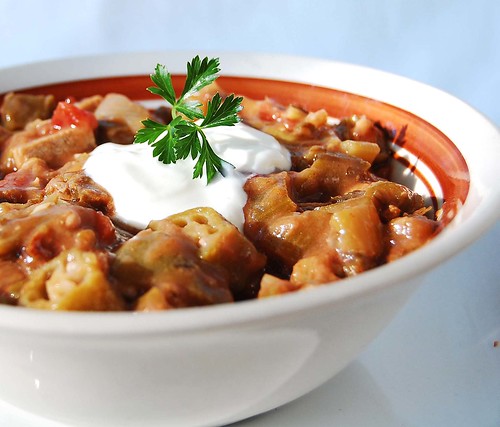 The original (meat-friendly) gumbo recipe comes from Paula Deen (but suprisingly doesn't have much butter). Below is my vegetarian version.